Microsoft Publisher 2013 includes booklet presets to choose from, so you won't have to worry about adjusting the page sizes or getting the pages to fall in the right order when it comes time to print.
Selecting a Booklet Page Design
Step 1
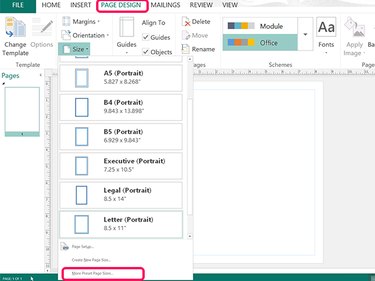
Open a blank publication. Click the Page Design tab and then click the Size icon. Select More Preset Page Sizes at the bottom of the drop-down menu.
Video of the Day
Step 2
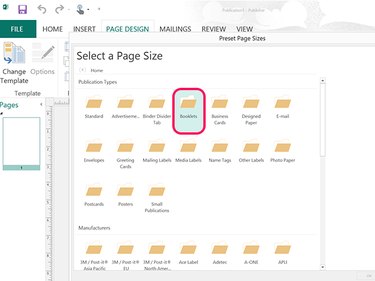
Click the Booklets folder. Other folders contain other page sizes.
Step 3
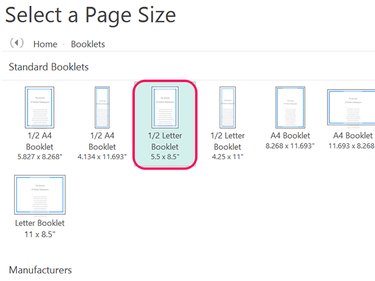
Select any booklet that suits your project. For a booklet made from letter-sized paper that's folded in landscape mode, select the first 1/2 Letter Booklet option, which has page sizes of 5.5 by 8.5 inches. This booklet generates four pages per sheet of paper. The first and fourth page are printed on one side of the sheet, with the second and third pages on the other side so when you fold the sheet in half, the four pages can be read in order.
Adding Text to the Booklet
Step 1
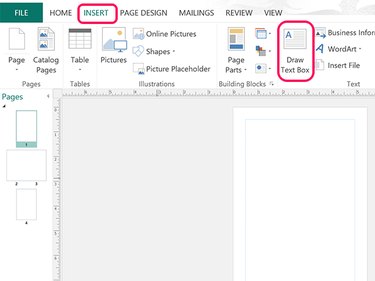
Click the Insert tab and then click the Draw Text Box icon. Drag the cursor over the first page where you want the title to appear. If you align the text box perfectly over the margins, you'll find that the text box borders overlap the margins after you release the mouse button. This behavior is normal and it ensures that the text inside the text box will be aligned with the page margins.
Step 2
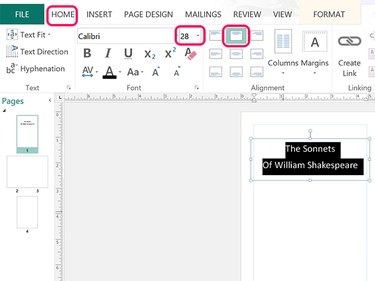
Type or paste the title in the text box. Highlight the text by dragging the cursor over every letter so you can format it. Click the Home tab and select a Font, Font Size and Alignment for the title.
Step 3
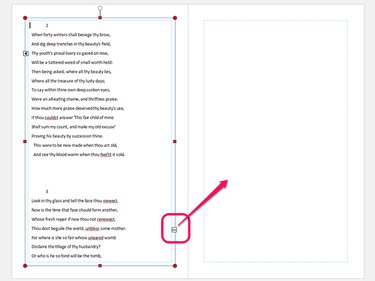
Draw text boxes on each of the other pages. Begin typing the content for the booklet in the first text box after the title or paste it from another document. When there is too much text for the box, an Overflow Indicator appears on the border. Click the Overflow Indicator and then click the next text box so the words can flow from one text box into the next. When the second text box is full, click the Overflow Indicator again to link it to the third, then link the third text box to the fourth until your four-page booklet is filled.
Step 4

Highlight all of the text by clicking the first text box containing the booklet's content and pressing Ctrl-A. Click the Home tab and format the text as desired. To use headings in the booklet, highlight the heading and then select a style from the Style icon in the Home ribbon.
Adding Images to the Booklet
Video of the Day
Step 1
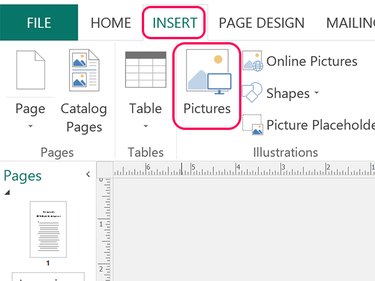
Add images from your computer by clicking the Insert menu and then clicking Pictures. To find images using Bing Image Search, click Online Pictures.
Step 2
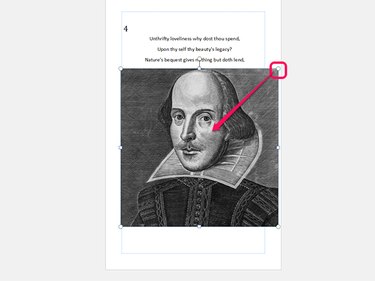
Drag any corner of the image to resize it without distorting its aspect ratio. To move an image, just drag it to where you want it to appear.
Step 3
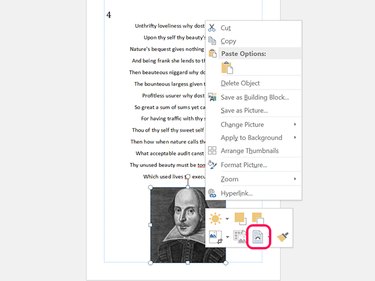
Right-click the image and click the Text Wrap icon if you need to adjust the way text wraps around the picture. By default, Text Wrap is enabled, but you can make the image appear beneath the text, over the text, or have it in-line with the text.
Printing the Booklet
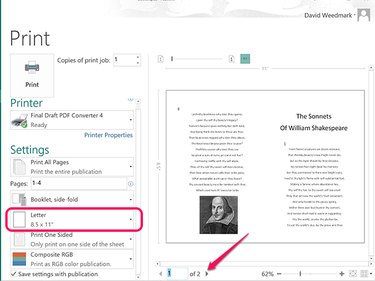
Click the File tab when you are ready to print the booklet. Select Letter-sized paper in the Settings section and then examine each page in the Preview window. Click the Arrow beneath the preview to examine other pages.