You can easily print index cards in Word 2013, regardless of the card size you need. Using Word's custom page size option, you can set up a document to print on any size card, including 3x5, 4x6, 5x7, or 5x8. Before going through the trouble of setting up Word to print a single index card, look at your printer's user guide to be certain it can accommodate the card size you need.
If you need to print a lot of cards at once, consider getting sheets of card stock for the size you need. These sheets are pre-cut so you can easily pull the cards apart after the sheet has been printed. Using a template, you can prepare Word to print several cards at once on each sheet.
Video of the Day
Video of the Day
Working on a Single Index Card
Step 1
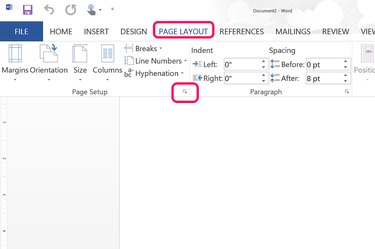
Open a new Word document. Click the "Page Layout" menu and then click the small arrow in the bottom-right corner of the Ribbon's Page Setup section.
Step 2
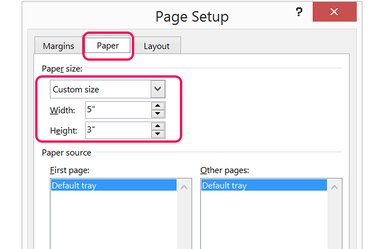
Click the "Paper" tab in the Page Setup window. Select "Custom Size" from the Paper Size menu and then change the dimensions to the size of your index card.
Step 3
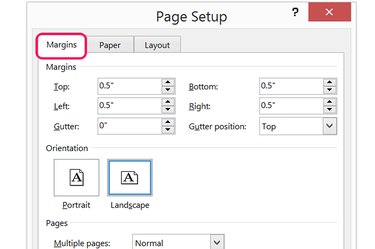
Click the "Margin" tab while the Page Setup window is still open and reduce the margins to at least a half-inch. Using the default 1-inch margins won't leave you much space on a 3-by-5-inch index card.
You can change the orientation here if needed. If you specified a width of 5 inches and a height of 3 inches, this puts the cards in landscape mode. Click "Portrait" if you want to flip these dimensions.
Step 4
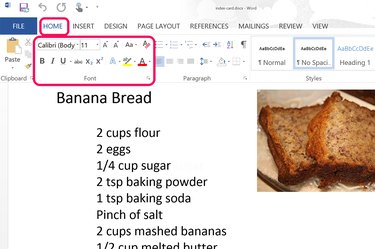
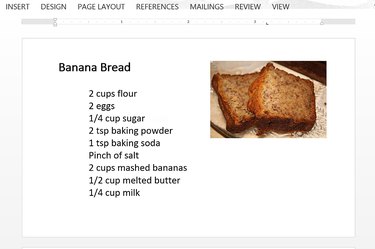
Type the content you want to appear in each index card as you would in any Word document. To change the style or the formatting of the text, click the "Home" tab. To insert a a picture or graphic, click the "Insert" menu. Resize the image as needed by dragging a corner and then drag the image to your desired location on the card. When you get to the end of a card, pressing "Enter" creates a new card after it.
Step 5
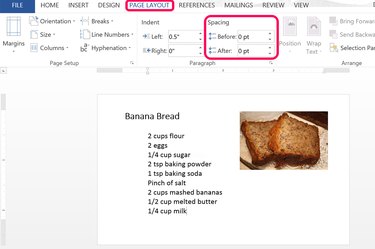
Click the "Page Layout" tab. Change the spacing in both the Before and After Paragraph menus to "0 pt" to maximize the amount of information you can fit into the index card.
Step 6
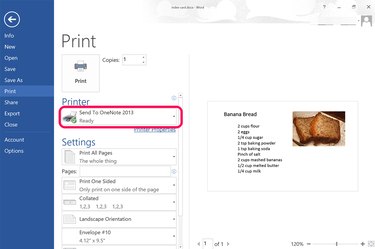
Turn on the printer and insert an index card into the appropriate printer feed for your printer. Click the "File" menu and select "Print" in the left menu. A preview of the index card print job appears on the right. Select your printer by clicking the "Printer" icon.
Working With a Sheet of Index Cards
Step 1
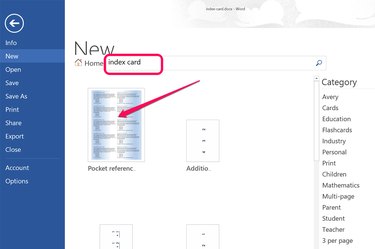
Launch Microsoft Word. Type "index cards" in the "Search for Online Templates" text field. In this tutorial, we are using the "Pocket Reference Cards (5 per Page, 2-Sided)" template by Microsoft Corporation, which is the first template listed when you search for "index cards."
If you need a specific type of card, use a more specific search. For example, if you type "flash cards" in the search field, several vocabulary and math flash card sets are returned with data already filled out. Math flash cards are available for multiplication, division, addition and subtraction exercises.
Alternatively, you may be able to download a Word template from the card stock manufacturer's website. If you choose this route, move the template file into the "Custom Office Templates" folder found in the Windows 8.1 Documents folder. When you launch Word, click "Personal" beneath the template Search field and select the template.
Step 2
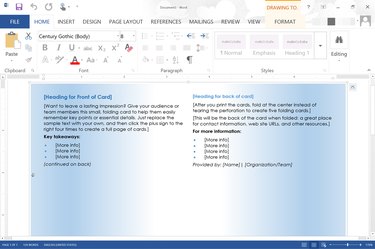
Edit the placeholder text to suit your purposes. Although templates can vary, the Pocket Reference Cards template used here displays two identical cards, one on the left and one on the right of the page, inside a single text box. If you change the fonts, spacing or document style, make sure the change doesn't hide any of the text in the cards. For example, if you increase the font size in a card, the increased font may push the bottom line beyond the visible area of the text box.
Step 3
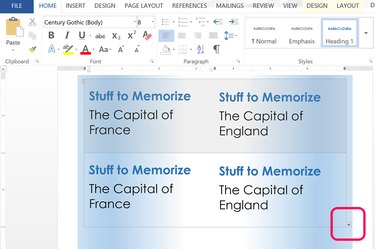
Click the text box containing the first two index cards after you have finished editing them. Click the "+" icon in the bottom-right corner of the text box. This button duplicates the altered cards. Continue clicking the "+" icon until you have a full page or until you have the number of cards that you need.
Note that as you continue adding new cards, Word automatically adds new pages to the document. Use the "Zoom" slider in the bottom-right corner of the window to zoom out and see several sheets at once. The bottom-left corner of the Word window displays the total number of pages in your document.
Step 4
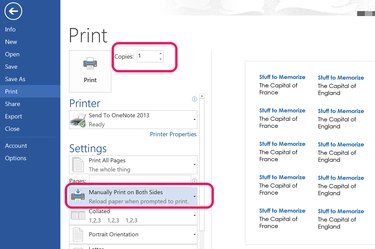
Click the "File" menu and select "Print" when you are ready to print your index cards. Select your printer and insert the card stock into the printer. Card stock designed for index cards is partially perforated so you can easily detach the cards from the sheet. Consult the packaging to be sure you have the correct template before printing. If you're unsure, print one page first and then adjust the margins in your Word document if needed.
If you want to print double-sided cards and if your printer doesn't support duplex printing, use the "Manually Print on Both Sides" option in the Settings section.