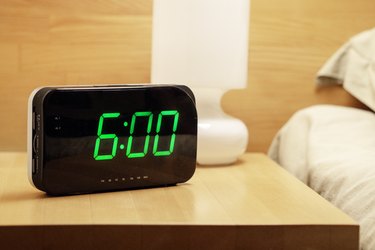
Although the Emerson SmartSet alarm clock instructions are included in the original packaging, they can be misplaced easily. Fortunately, SmartSet technology makes the alarm clock exceptionally simple to operate. Many of the operational aspects of these alarm clocks are automated, and they require little maintenance or interference unless the user wants custom settings.
How SmartSet Devices Function
Video of the Day
Emerson SmartSet directions are easy to follow because the technology is designed to automatically set the clock to the accurate time along with the exact day, month and year. As a result, the clock doesn't require any manual settings unless the user prefers a different, inaccurate setting.
Video of the Day
The only exception to this rule applies to daylight savings settings. These settings vary according to the year the clock was released, and there are three different groupings for daylight savings settings with special instructions for each group. These special Emerson SmartSet directions remain simple to execute to ensure the clock is accurate through specific time change scenarios.
If the clock fails to display the accurate time and date settings or the user desires a different setting, making the change is simple. Some clock owners prefer setting the clock ahead to allow a time buffer that prevents them from being late for work or school. Others may want to play a time prank on their family or friends.
Customizing the Settings
Maintaining an accurate time and date setting is automatic and requires no adjustments. Making manual adjustments for custom settings, however, is easy. Begin by holding down the Time button while selecting the Tune up or Tune down button options.
Pressing the up or down button a single time adds or subtracts a full minute. Holding the button briefly increases or decreases the time slowly. Holding the button for longer time increases the speed at which the time changes. Only hold the button to make a significant time change, otherwise use single depressions to add or subtract a few minutes.
The alarm clock settings work similarly. The clock comes with two different alarm time-setting options. Set both for multiple wake-up times if needed. Press and hold the button labeled Alarm 1 to activate the alarm time adjustment. While holding the button, use the Tune up or Tune down control options. The changes work in the same manner as changing the general time.
Select and hold the Alarm 2 button and use the same controls to adjust the time. Only use this option if you need a second alarm sound. Otherwise, leave the alarm in the off position.
Daylight Savings Settings
Daylight savings time influences the Smart Set directions for some models, although it adjusts automatically for many of the models in circulation. Three groupings of models exist under the daylight savings settings. The reason for the difference in automatic daylight savings changes involves changes to the laws and different state participation requirements.
The first grouping includes clocks manufactured before January 2006. The serial numbers begin with 506 or 512, and accurate daylight savings time requires users to manually adjust the time zone four times a year.
The second group of clocks begins with serial numbers 601 or 603 and was manufactured between January 2006 and July 2006. These clocks require adjustments twice a year for the spring and fall time changes.
The final group includes clocks manufactured after July 2006, and the serial numbers begin with 608 or 609. These clocks adjust automatically for all time changes and require no manual adjustments.