• Around The HomeToggle Menu

    • Entertainment
    • Productivity
    • Smart Home
  • FamilyToggle Menu

    • Parenting
    • Toys
    • Pets
    • Travel
  • ReviewsToggle Menu

    • Phones
    • Tablets
    • Laptops
    • Desktops
    • Wearables
    • Audio
    • Cameras
    • Headphones
    • Printers
    • Smart Home
    • TVs
    • Gaming and Video
  • One Cool ThingToggle Menu

    • Frugal Tech
    • Kickstarters
    • Videos
  1. Home
  2. Around The Home
  3. Entertainment
  4. How to Fix Audio Problems on VHS Tapes

How to Fix Audio Problems on VHS Tapes

By: James Clark
  • Share
  • Share on Facebook

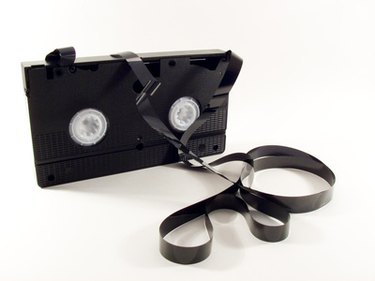
VHS tapes carry a magnetic signal coded with video and audio recordings for playback in a VCR or camcorder connect to a TV. While playing VHS tapes, you may occasionally experience audio problems that result in distorted sound or no sound at all, especially from older cassettes that may have been played extensively through the years. Try troubleshooting the VHS tape and the VCR to resolve cassette audio problems.

...
VHS cassette with exposed, snarled video tape.

Step

Push the red and white audio cables firmly into the jacks on the back of the VCR and check the connections on the other end of the cables to ensure they are plugged securely into a TV or audio-video receiver.

Step

Test VCR playback using different VHS cassettes to confirm the problem is a specific tape, rather than the VCR itself.

Step

Insert the problem VHS cassette into the VCR, which starts automatically. Press the "Stop" button on the VCR to halt playback.

Video of the Day

Step

Press the "FF" (Fast-Forward) button on the VCR to advance the tape to the end. The VCR will stop and with some models begin rewinding automatically. If the VCR does not rewind, press the "Rewind" button to return to the beginning of the tape. This back-and-forth winding may seat the tape more evenly on the spools so the VCR heads can read the analog audio track.

Step

Press "Play" to test the VHS tape. Press and hold the up or down arrow key labeled "Tracking" on the VCR remote for fine adjustments of the tape heads inside. Proper alignment of the tape heads with the magnetic VHS tape may restore audio.

Step

Eject the VHS tape and insert the VCR cleaning cassette into the VCR. Press "Play" to start the cleaning cycle, which typically takes 20-30 seconds, depending on the cleaning product. Eject the cleaning cassette and insert the VHS cassette to test for audio playback.

Show Comments

Related Articles

How to Fix a Cassette Deck

How to Fix a Cassette Deck

Around The Home
Entertainment
By: Techwalla Contributor
How to Connect a VCR to a Flat-Screen TV

How to Connect a VCR to a Flat-Screen TV

Around The Home
Entertainment
By: James Clark
How to Troubleshoot a VCR That Won't Accept Video Cassettes

How to Troubleshoot a VCR That Won't Accept Video Cassettes

Around The Home
Entertainment
By: Jeff VanVickle
How to Work the Emerson DVD/VCR Combo Codes Without a Remote

How to Work the Emerson DVD/VCR Combo Codes Without a Remote

Around The Home
Entertainment
By: Greyson Ferguson
How to Record from Foxtel IQ to a DVD Recorder

How to Record from Foxtel IQ to a DVD Recorder

Around The Home
Entertainment
By: Maya Austen
How to Troubleshoot a Pioneer DVD Player

How to Troubleshoot a Pioneer DVD Player

Around The Home
Entertainment
By: James Clark
  • HOW WE SCORE
  • ABOUT US
  • CONTACT US
  • TERMS
  • PRIVACY POLICY
  • COPYRIGHT POLICY
  • Advertise

An error occurred. Try again later.

Thanks for signing up!
© 2019 Leaf Group Ltd. Leaf Group Media

Get great tech advice delivered to your inbox.

Keep your family productive, connected, entertained, and safe.

Please enter a valid email.