Resizing image files, like JPG photos, is something you can do quickly using Windows Photo Gallery, a free app that comes already installed on most Windows computers. If you don't already have it, you can download the app for free from Microsoft. For anyone wondering how to reduce JPGs with Microsoft Paint, save yourself some aggravation by using Photo Gallery instead.
Step 1
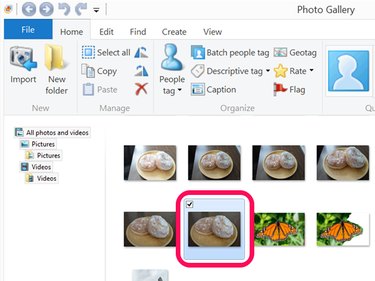
Open Photo Gallery. This app is part of Windows Essentials 2012. If you don't already have it, download Windows Photo Gallery and install it on your computer for free. Wait a minute or two while it scans all of the images on your computer. Scroll through the thumbnails and select the image you want to resize.
Video of the Day
Step 2
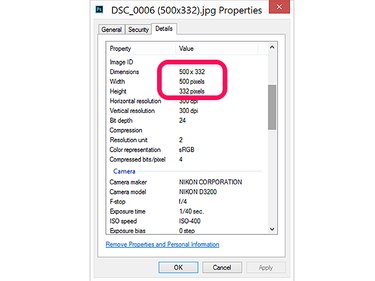
Right-click the thumbnail and select Properties if you want to know the photo's current size. Click the Details tab in the Properties window to see the file size. Make a note of both the width and height, which are measured in pixels. An inch is 96 pixels.
Step 3
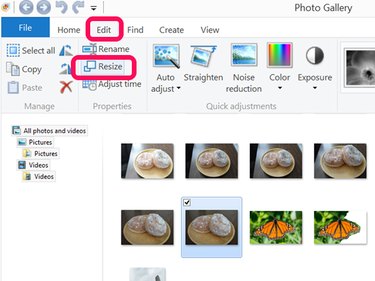
Click the Edit menu while the image is still selected. Click Resize to open the Resize window.
Step 4
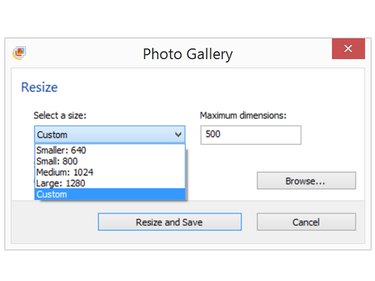
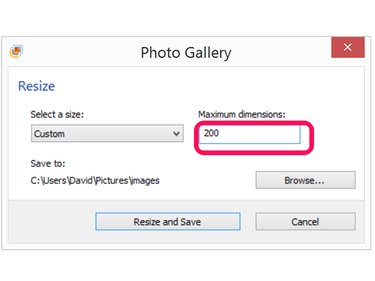
Click the Size menu and then click Custom. Note that only the maximum dimension is listed here in pixels, either the vertical or horizontal measurement. If the current maximum dimension is listed as 500 pixels, this would be the width in a landscape-oriented photo and the height in a portrait-oriented photo.
While you can select a preset size from this menu, note that the Small and Smaller options are fixed at 800 and 640 pixels respectively, which may not always be smaller than the image's current size.
Step 5

Click the current maximum dimension and change it to the size you need. The smaller dimension of your photo will also be reduced proportionately. For example, if you reduce the maximum dimension by half, the smaller dimension will also shrink by half. Click Resize and Save. This creates a copy of the original JPEG.
Step 6
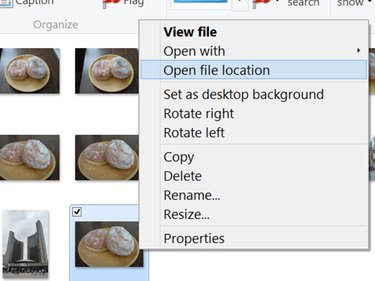
Locate the new JPG. Photos aren't labelled in Photo Gallery; however, the new photo always appears at the end of the group where the original is located. If you have several photos that look the same, you can always make sure that you selected the right one by looking at its file size in Properties. Drag the new JPG onto the desktop, or right-click the thumbnail and select Open File Location to find it in File Explorer.
Video of the Day