Word 2013 includes a Check Box option that can be checked and unchecked when someone clicks on it. Once you've added a Check Box, you can change its Style and its appearance when it's checked or unchecked. To use this Check Box, you'll need to first add the Developer tab to Microsoft Word.
Inserting a Changeable Check Box
Video of the Day
Step 1
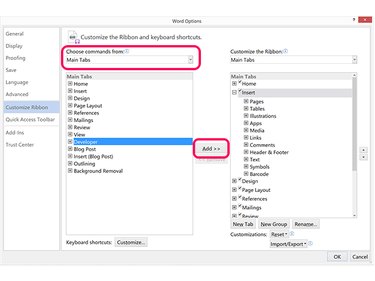
Add the Developer tab to Word. Click the File tab, select Options and then Customize Ribbon. Select Main Tabs, click Developer and then click the Add button. Click OK.
Video of the Day
Step 2
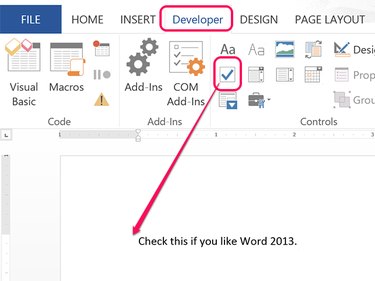
Place the cursor where you want the check box to appear. Click the new Developer tab and then click the Check Box icon. An empty check box appears on the page.
Step 3
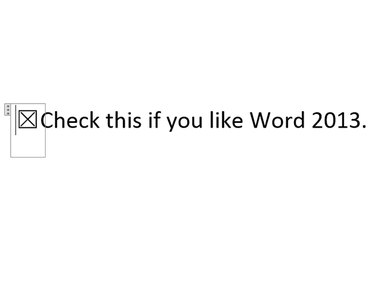
Click the Check Box to put an X in it. Click it again to clear the X.
Customizing a Check Box
Step 1
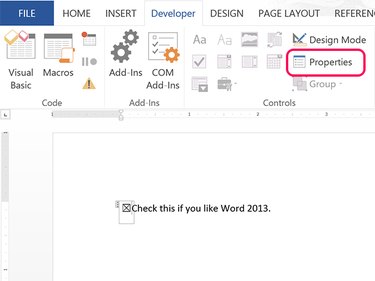
Click the Check Box so that the cursor appears inside the bounding box surrounding it. Click the Developer tab and then click the Properties icon. The Content Control Properties window box opens.
Step 2
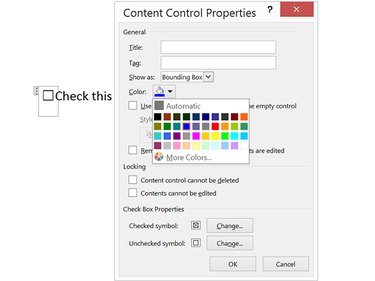
Enter a Title and Tag if desired. Click the Show As menu to change the Bounding Box to a Start/End Tag or select None to make it invisible. Click the Color menu to change the Bounding Box's color.
Step 3
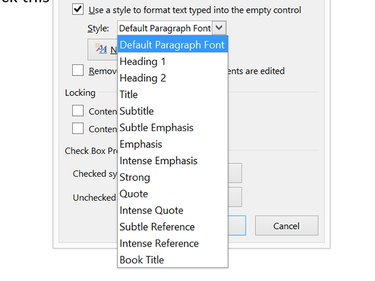
To use a style to format the text that appears in the Check Box, click that Check Box and then click the Style menu to choose your style.
Step 4
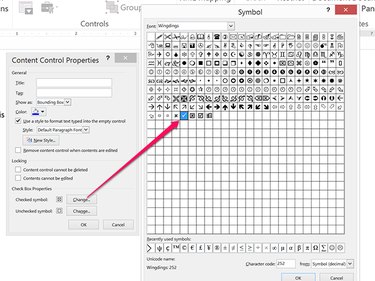
Click the Checked Symbol Change button to select what should appear when the Check Box is clicked. If you want a plain Check Mark, or a Check Mark in a Box, you'll find those options in the Wingdings Font.
Step 5

Click the Unchecked Symbol Change button to select how the Check Box should look when it's empty.
Note that there are also options to remove the content control after the contents have been edited, as well as to lock content control from being deleted or from being edited. Click OK when you're finished to save the changes.
Step 6
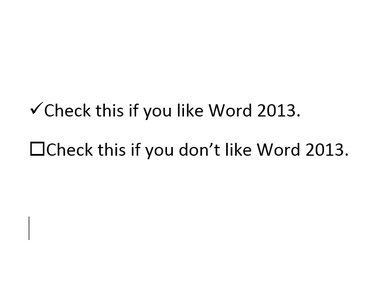
Click the Check Box to see how it looks when checked and unchecked. If you copy and paste this check box, the copy retains the changes you specified.