A DVR hard drive will eventually fill up with digital video recordings of TV programs unless some of the files are offloaded to another device, such as a computer. DVRs equipped with an Ethernet port can be quickly connected to a PC for transferring programs. Since the video files are digital, the PC mouse or touchpad on a laptop can be used to drag and drop files from the DVR onto the computer's hard drive, so hours of programming can be transferred in seconds.
Step 1
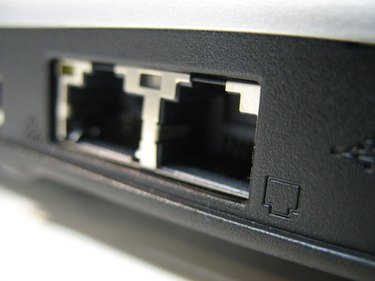
Connect the cable to the Ethernet ports on the back of the DVR and the computer or laptop. Wait for the "New Hardware Detected" message to appear on the computer screen.
Video of the Day
Step 2
Double-click the hardware message to display the contents of the DVR hard drive.
Step 3
Open an existing folder on the computer containing video files, or create a new folder by clicking "Computer" and selecting "Libraries," then choosing "Videos." Click the right-hand mouse button and choose "New Folder" to make a folder for storing video files off the DVR. Type a name for the folder in the blank space provided for easy identification.
Step 4
Click and hold the mouse button on the file stored on the DVR for transfer to the PC, then drag the file with the mouse to the video folder created on the PC and release the button. This drops a copy of the video file from the DVR onto the computer. Grab several files at once by pressing and holding the "Control" (Ctrl) key while clicking on each file.
Video of the Day