Rather than writing out envelope after envelope by hand in Word 2013, set up an envelope template containing your return address and load an Excel spreadsheet containing the addresses you want to use. With just a few steps to import the data, Word produces an envelope for every recipient on your mailing list.
Step 1
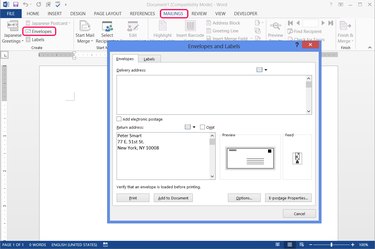
Press "Envelopes" on the Mailings tab in Word to start a new envelope project. Fill in your return address if you want to use one, but leave the delivery address blank.
Video of the Day
Step 2
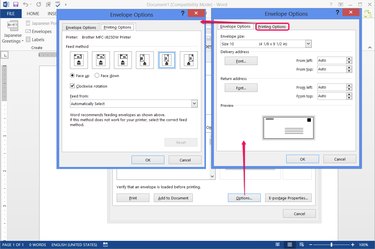
Press "Options" and set the envelope size on the Envelope Options tab. The options also include font settings and margin settings. Word automatically picks a direction to feed envelopes based on your printer model, but if you need to change the feed, open the Printing Options tab.
Step 3
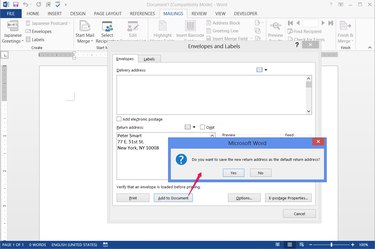
Click "Add to Document" to create the envelope template. If you entered a new return address, choose whether to set it as the default for later use.
Step 4
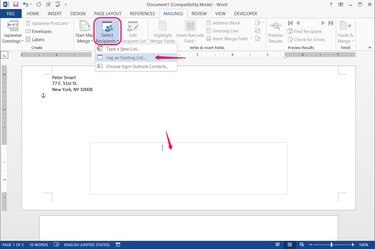
Place the cursor in the delivery address text box in the lower half of the envelope. You can't see the box until you click it, but one click anywhere in the box activates it correctly. Press "Select Recipients" on the Mailings tab and choose "Use an Existing List" to load your Excel file and start a mail merge. If you've followed the directions so far, you do not need to click the "Start Mail Merge" button at any point.
Step 5
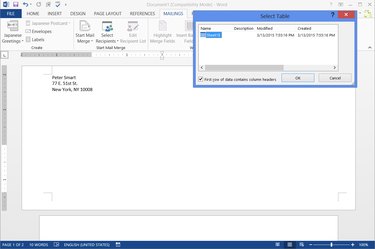
Pick which spreadsheet or table in the Excel workbook contains your addresses if the file has multiple options. Choose whether the top row contains headers, such as "Name" and "Address," and press "OK."
Step 6
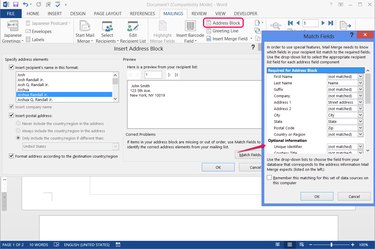
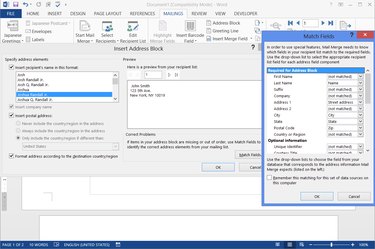
Click "Address Block" to set up how addresses appear on the envelopes. Choose formatting options on the left side of the window to adjust the preview. If the preview is missing information from your Excel file, press "Match Fields" to assign parts of each address to specific columns in the spreadsheet.
Word is adept at interpreting address data in Excel, even if you don't split it into "City," "State," "Postal Code" and other columns. Between Word's automatic detection and the Match Fields options, you usually won't need to edit the Excel file to make it work in Word.
Step 7
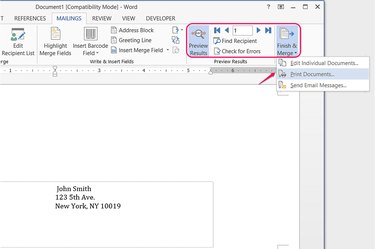
Press "Preview Results" to view a sample of the first envelope, and use the arrows or "Find Recipient" buttons in the Preview Results section to check other envelopes. You don't need to look at each entry before printing -- just make sure the general format looks right. Click the "Finish & Merge" button and choose "Print Documents" to print. If you'd rather save the envelope layout, addresses included, choose "Edit Individual Documents."
Step 8
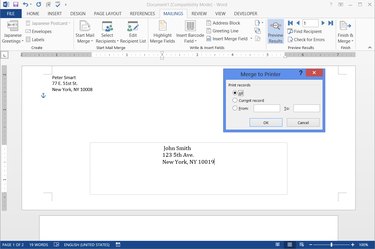
Select "All" to print an envelope for each address, or specify a range of entries, in the order of your Excel list. Pick "Current Record" to print the one envelope on the screen.
Video of the Day